If you’re experiencing issues with sound on your Windows 11 system, it can be frustrating, but there are several steps you can take to troubleshoot and fix the problem. Here’s a detailed tutorial on how to fix Windows 11 when there’s no sound:
How to Fix Windows 11 with No Sound
Step 1: Check Hardware Connections
- Physical Connections:
- Ensure that your speakers or headphones are properly connected to the audio jack on your computer.
- If you’re using external speakers, make sure they are powered on and the volume is turned up.
Step 2: Verify Sound Settings
- Check Volume Settings:

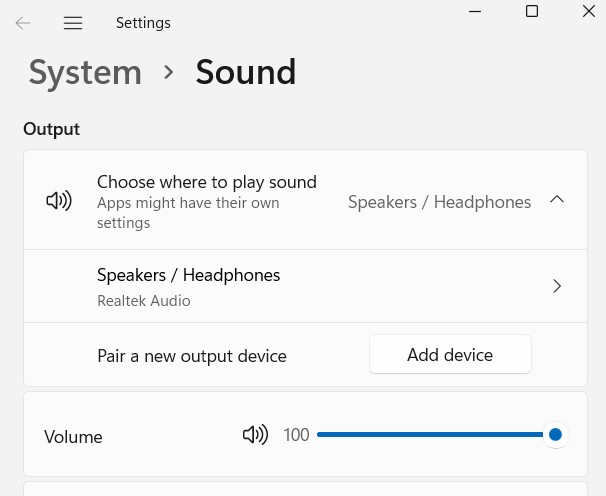
- Right-click on the speaker icon in the taskbar and select “Open Sound settings.”
- Ensure that the volume is turned up and not muted.

- Select the Correct Output Device:
- Under the “Output” section, make sure the correct playback device is selected. If you have external speakers or headphones, choose the corresponding device.
Step 3: Update Audio Drivers
- Update Audio Drivers:
- Press
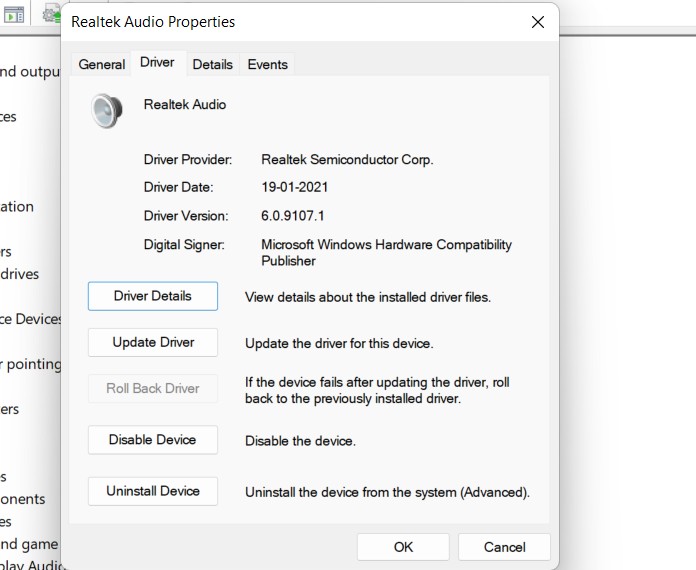
Win + Xand select “Device Manager.” - Locate and expand the “Sound, video and game controllers” section.
- Right-click on your audio device and select “Update driver.”
- Choose “Search automatically for updated driver software” and follow the on-screen instructions.

- Press
Step 4: Restart Windows Audio Service
- Restart Windows Audio Service:
- Press
Win + Rto open the Run dialog, typeservices.msc, and press Enter. - Scroll down and find “Windows Audio” in the list.
- Right-click on “Windows Audio” and select “Restart.”
- Press
Step 5: Run the Windows Troubleshooter
- Run the Troubleshooter:
- Open Settings (
Win + I) and go to “System” > “Sound.” - Under “Related settings,” click on “Troubleshoot.”
- Follow the on-screen instructions to identify and fix sound-related issues.
- Open Settings (
Step 6: Check for Windows Updates
- Update Windows:
- Make sure your Windows 11 is up to date. Open Settings (
Win + I) and go to “Windows Update.” - Click on “Check for updates” and install any pending updates.
- Make sure your Windows 11 is up to date. Open Settings (
Step 7: Reinstall Audio Drivers
- Reinstall Audio Drivers:
- Open Device Manager (
Win + X> “Device Manager”). - Right-click on your audio device and select “Uninstall device.”
- Restart your computer. Windows will automatically reinstall the audio driver.
- Open Device Manager (
Step 8: Check Third-Party Applications
- Check Third-Party Applications:
- Some third-party applications may interfere with the audio. Try closing or uninstalling recently installed apps to see if the issue persists.
Step 9: System Restore
- System Restore:
- If the problem started recently, you can perform a System Restore to revert your system to a previous state.
- Open the Start menu, type “Create a restore point,” and select the result.
- Click on the “System Restore” button and follow the on-screen instructions.
Step 10: Check for Hardware Issues
- Check for Hardware Issues:
- Test your speakers or headphones on another device to ensure they are working correctly.
- If possible, try a different set of speakers or headphones on your Windows 11 system.
Conclusion
By following these steps, you should be able to troubleshoot and fix sound issues on your Windows 11 system. If the problem persists, it’s advisable to reach out to Microsoft support or consult relevant forums for further assistance.

